
| Solution ID: | sk65205 | |
| Product: | Security Gateway, Security Management | |
| Version: | NGX R65, R70, R71, R75, R76 | |
| OS: | SecurePlatform, SecurePlatform 2.6, Gaia | |
| Platform / Model: | All | |
| Date Created: | 06-Sep-2011 | |
| Last Modified: | 18-Mar-2013 |
ISOmorphic is the utility for creating a bootable USB device, capable of installing SecurePlatform and Gaia on Check Point appliances and Open Servers (for USB installation on IP Appliances, see sk83200).
Note: To view the list of USB flash keys that are known to work with ISOmorphic, see sk92423.
To use ISOmorphic, perform the following steps:
A. Prepare the USB device
1. Make sure you have the SecurePlatform/Gaia ISO file corresponding to the appliance model you need to install and the relevant release.
Note: Installing from VSX NGX R67.10 ISO is not supported using ISOmorphic.
2. Run the ISOmorphic tool (download here)
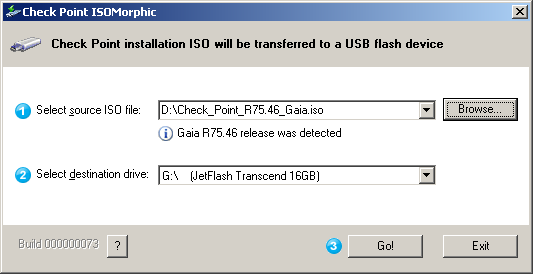
3. Choose the Source SecurePlatform/Gaia ISO file
4. Choose the destination drive
5. Press the "Go!" button. A warning message will appear
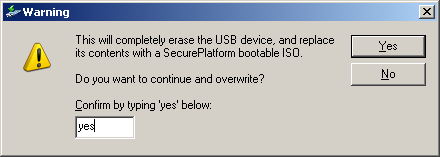
Note: all data on the USB device will be erased.
6. Verify your selections. Write "yes" in the new warning window to confirm the USB drive formatting.
The USB drive is being prepared. A window that displays the progress is displayed
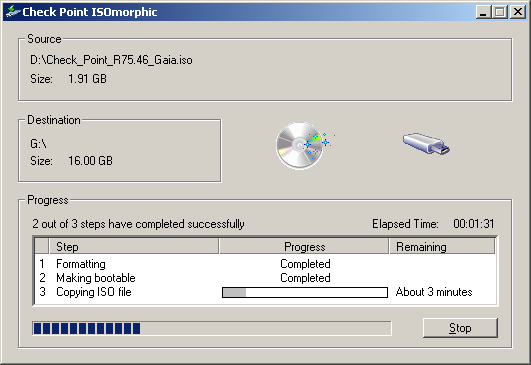
Wait until the steps are completed.
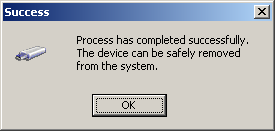
Now you may remove the USB drive.
The USB is now ready for the installation
B. Install the Appliance/Open Server
1. Connect the USB device to the machine
2. Turn on the machine. Once booted successfully via the USB drive, syslinux window will appear.
Note: If the machine did not boot from the USB device check the BIOS settings.
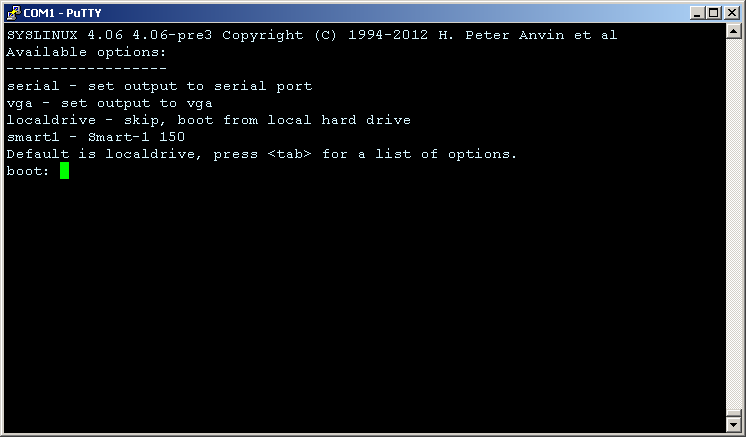
You should type the boot option according to the connection type you are using:
vga - for VGA or other graphic mode connection
serial - for serial connection (e.g. console connection on Appliances)
The "smart1" option is for installing Smart-1 150 Appliance
Note: If no option is typed, after 90 seconds the installation will be aborted and the machine will boot from the local drive.
2. The installation process starts and continues the same way as CDROM installation.
Note: On some of SecurePlatform versions the system needs to know from which partition to load the SecurePlatform image.
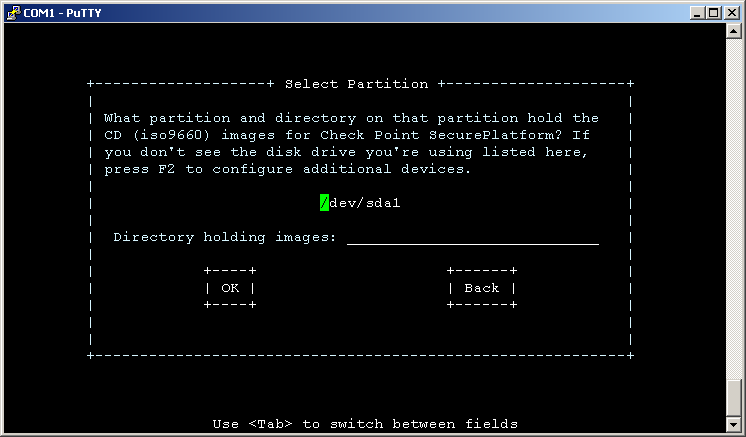
Usually you should select the last option on the list
Note:
The following message might appear on the screen during installation:
Example:
Root cause:
Busybox that is used for SecurePlatform installation from USB Storage was not compiled with 64bit file-offsets (_FILE_OFFSET_BITS=64). The ramdisk on the USB Storage mounts the ISO image, and then mounts 'stage2.img' from the ISO image, afterwards it unmounts the ISO image, and 'stage2.img' remounts the ISO. When 'stage2.img' is running, 'find' command complains when it sees an ISO file bigger than 2 GB.
Clarification:
This message can be safely ignored. The installation completes successfully, and installed software works correctly.
Busybox with 64bit file-offset support was integrated into:
The following message might appear on the screen during installation:
find: /tmp/hdimage/Name_Of_ISO_Image.iso: Value too large for defined data typeExample:
find: /tmp/hdimage/Check_Point_R75.20_Appliance.iso: Value too large for defined data typeRoot cause:
Busybox that is used for SecurePlatform installation from USB Storage was not compiled with 64bit file-offsets (_FILE_OFFSET_BITS=64). The ramdisk on the USB Storage mounts the ISO image, and then mounts 'stage2.img' from the ISO image, afterwards it unmounts the ISO image, and 'stage2.img' remounts the ISO. When 'stage2.img' is running, 'find' command complains when it sees an ISO file bigger than 2 GB.
Clarification:
This message can be safely ignored. The installation completes successfully, and installed software works correctly.
Busybox with 64bit file-offset support was integrated into:
- VSX NGX R67.10
- future Gaia OS release
Remember:
- ISOmorphic can be used for fresh install only.
- ISOmorphic is provided as a utility to ease installation.
- Customers can use any tool they want to format their flash keys. Check Point does not enforce the usage of ISOmorphic.
No comments:
Post a Comment